Video editing appears very simple to the untrained eye. It is usually an editor’s job to ensure that viewers don’t notice any editing. Our brains don’t even notice cuts or transitions anymore, as we have become accustomed to modern filmmaking techniques. They aren’t meant to be noticed unless they’re clearly jarring.
Behind the scenes, there is a lot of work that goes into creating a professional video for your brand. Unfortunately, all that hard work can add considerable time to your video editing project. So let’s dive into some ways to edit videos much faster in Premiere Pro.
One of the reasons I can take on so many video editing projects is my ability to manage time, work efficiently and turn around projects quickly. The part of video editing is usually the biggest bottleneck to finishing projects, which limits how many projects you can take, thus limiting how much attention you can give your clients. In the following, I’m giving you a few tips to edit videos much faster in Premiere Pro.
1. Use the Proper Hardware
Video editing is not a matter of a Mac or PC. Both systems can be used to edit videos. But it takes a lot of processing power, and your computer needs to have sufficient hardware to handle what you’re throwing at it.
Essentially a faster computer allows you to spend more time on the story than rendering it. Therefore, concentrate on the four key variables: memory (RAM), storage, processor (CPU), and graphics (GPU), when choosing your laptop or desktop.
RAM
RAM (Random Access Memory), also known as the computer’s short-term memory, allows you to access many programs at once with great speed. Your ability to edit videos much faster in Premiere Pro will depend on how much RAM you have.
Windows systems or Intel-based Mac video editing workstations should have at least 32GB of memory. 32GB RAM allows you to run multiple programs simultaneously and still be able to edit and preview your videos. It will also allow you to edit your videos fully without slowing down the workflow. 64GB might be necessary if you plan to edit 8K files or use motion graphics.
For Apple M1 systems, I recommend 16GB of shared memory.
Storage
A storage drive is essential for everything: booting up, loading source files, previewing video, and exporting video. A storage drive’s speed determines how easy it is to locate the files you need.
SSDs can boot up 2-4 times faster than HDDs and quickly locate and open files. They use the same technology as memory cards and make video playback much smoother. Make sure you always have your files on SDDs when editing.
Adobe recommends a minimum of a two-drive RAID, with at least one solid state drive. This setup allows you to assign specific tasks to each drive, spreading out the work.
CPU
The CPU, also known as the “central processing unit,” is the brain of the operation. It does the calculations and performs all the tasks needed to run OS and software.
For Premiere Pro, eight cores are sufficient. Premiere Pro runs at 93-98% efficiency with eight cores depending on the task. Have at least a Core i7 or Core i9 Intel processor, AMD equivalent, or Apple M1. Intel Core i7 and Core i9 (and the latest mobile Xeon processors) offer Quick Sync technology, which accelerates decoding/playback of H.264 and HEVC codecs.
GPU
While a GPU (graphics processing unit) is similar to the CPU in many ways, it has a significantly larger physical appearance. Whereas the CPU computes information and tasks for general computing purposes, the GPU processes graphical tasks that vary from watching videos on YouTube to editing special effects to rendering your finished video edits.
I recommend a GPU with at least 4GB of memory (VRAM). Multiple GPUs, including eGPUs, will speed up export and rendering in Premiere Pro. Apple M1 systems use shared memory for graphics processing. For video editing, you should use M1 systems with at least 16GB of Unified Memory.
Screen
Over time, you will appreciate an ultrawide monitor when working in Premiere Pro. A screen with at least 32 inches reduces the need to scroll through your timeline and saves you precious time.
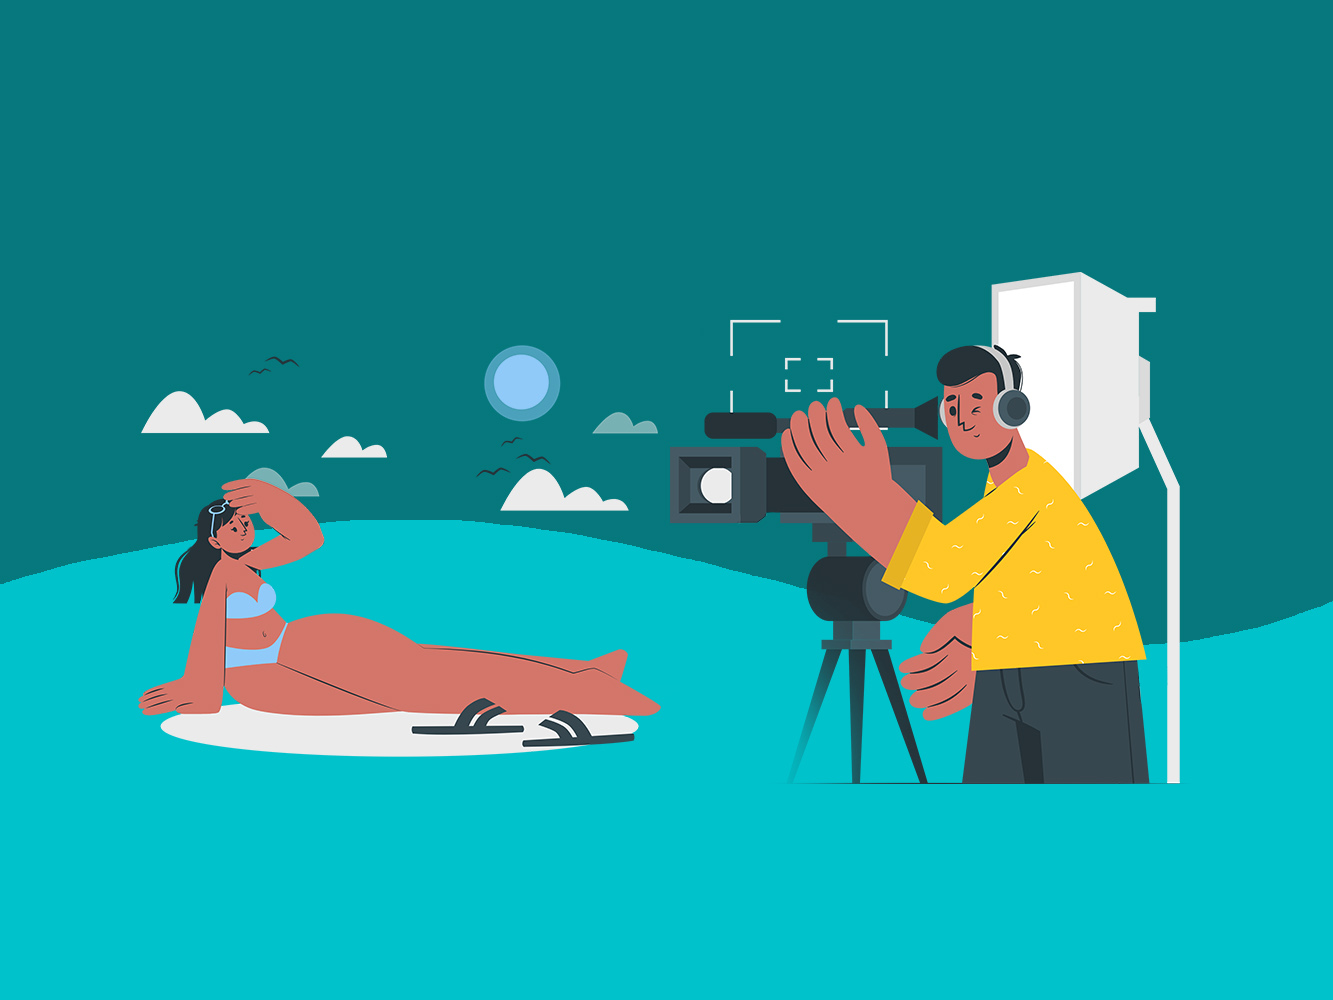
2. Shoot for the Edit
One of the best ways to edit videos much faster in Premiere Pro is to preplan before shooting. This will allow you to maximize your time while filming. You need to think about what shots are required for the beginning, middle, and end of your story.
If you’re on set shooting without a clear vision of what you want your final video to look like, you’re going to waste a lot of time once you sit down to try and bring it all together.
I find that when I storyboard a video shot for shot, the edit only takes a few hours instead if I shoot hours of random footage. Those edits usually take several days.
Also, consider where you can make adjustments to prevent the need for substantial editing after shooting. If you feel that a shot is unstable, not focused, or at the wrong angle, capture it again.
My pro tip: While shooting, end each video clip with a 3-second silent buffer to avoid abrupt cuts and shoot enough B-roll to support your story visually.
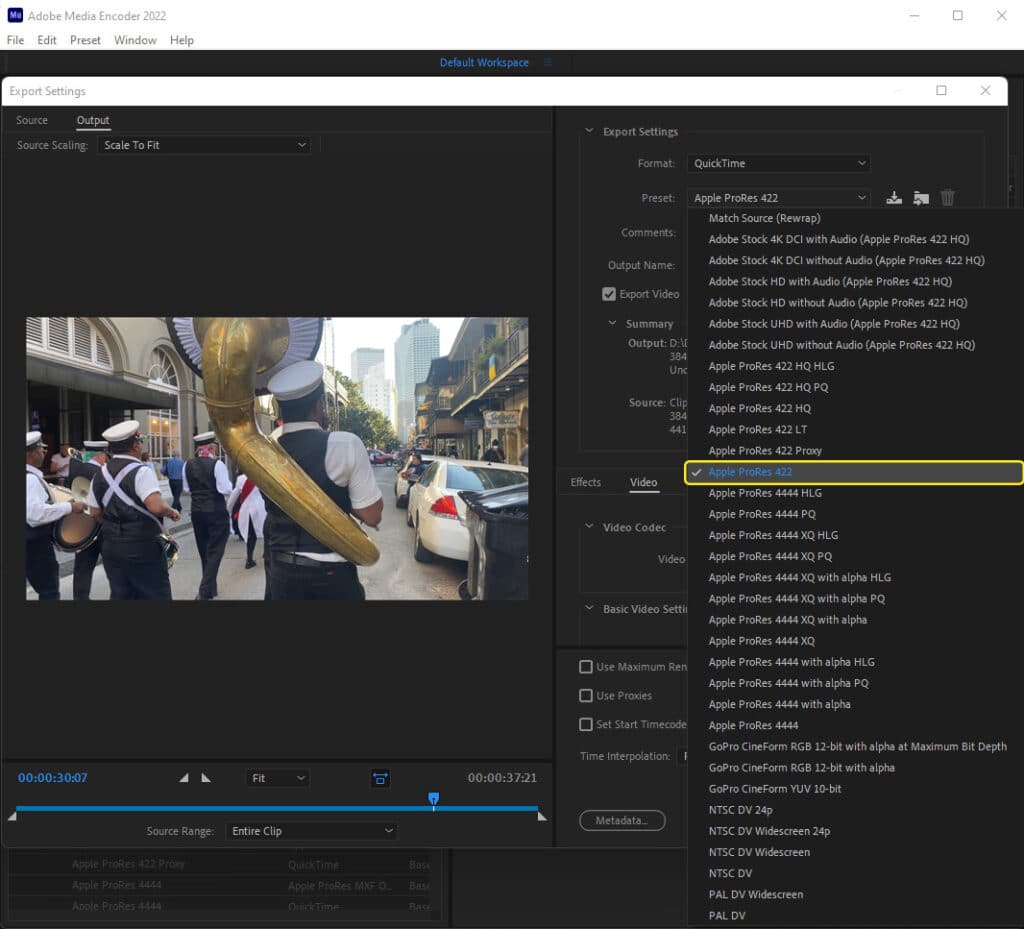
3. Avoid Compressed Codecs
Compressed codecs are excellent for recording and uploading but not for editing. H.264 and other compressed codecs take longer to decompress during editing, and as a result, they often have laggy playback. This makes it difficult to efficiently work on your professional video edit, even if you have a high-performance computer.
Editing is easier with codecs like Apple’s ProRes and GoPro’s Cineform. These codecs are designed to retain your source footage’s image quality and details but optimized for better playback.
Here is what you can do if you’re stuck with high-compression codecs:
Transcoding
Transcoding is the process of reformatting, decoding, and re-encoding files. For example, it takes source footage in H.264 and converts it into Apple ProRes. This increases the performance of the editing software and the user experience for you.
Transcodes have the same frame rates as your original files but will be a lot bigger in file size. My advice is only to do this if you’re working on big projects since it might take more time to transcode than edit if it’s only a short video.
Premiere Pro uses Adobe Media Encoder to transcode video content in the background of your editing process. You can work with files in the original format, and Media Encoder will link to new files after they have been transcoded.
My pro tip: If you often deal with this problem, you can automate the transcoding process with Adobe Media Encoder’s “Watch Folders” feature.
Use Proxy Files
Another technique to improve Premiere Pro’s playback is using proxy files. Proxies are low-resolution video files that can be used to replace larger-resolution files in your timeline. This is crucial because lower-resolution files render quicker in your Premiere Pro, which is particularly useful for uncompressed and raw video.
Proxy workflows are used by editors when they work on a large-scale feature project. Again, this is to ensure that the computer can handle the load.
To make a proxy in Premiere Pro, you have to select all of your footage, right-click, and then hover over to “Proxy”, then “Create Proxies”. From here, Adobe Media Encoder will import your footage, and you can select the codec, resolution, and bitrate of your new proxy files.
4. Data Management
Data management is all about organization and redundancy, an essential part of your job as a video editor. This is especially true if you want to collaborate with other editors to edit videos much faster in Premiere Pro.
Backup
If your drive crashes, you will need to quickly recover your files to finish your edits as if nothing happened. While you might never have to go to your backup drives, a good data management system can give you peace of mind.
I highly recommend keeping at least two copies of your project files. Applications like GoodSync are easy solutions you can use to accomplish that. I love this program because you can synchronize files located on a PC, Mac, smartphone, tablet, hard drive, network, USB, FTP, SFTP, WebDAV, or Amazon S3.
The synchronization can be done locally, through a network, or on the internet. Additionally, you can put it on a schedule to automatically back up at a specific time.
Organization
Before importing media files or opening Premiere Pro, you must set up your project folder. By creating a clear folder structure, you avoid having your media assets scattered across different locations, which can result in files being moved or deleted, leaving your Premiere Pro unable to find them. Your folder organization becomes even more important when you share your project with someone else.
The following is an example of how I structure my project folder:
Depending on the size and complexity of your project, each section may have multiple subfolders. Although it’s time-consuming to organize your files and projects well, a small amount of time spent labeling your footage and managing it can help you save hours of time and effort on a project.
My pro tip: Leave a sample project folder on your desktop, which you can easily duplicate or write a batch script that creates this folder structure with a button click.
5. Have an Asset Library
This folder encompasses every type of add-on that you’ll be using to complete your video project: sound effects, overlays like lens flares and light leaks, and LUTs.
You can then import the required asset into your project rather than duplicate assets and keep them inside the individual project folders. By doing this, you’ll save space, and you’ll quickly know where to find all of your assets.
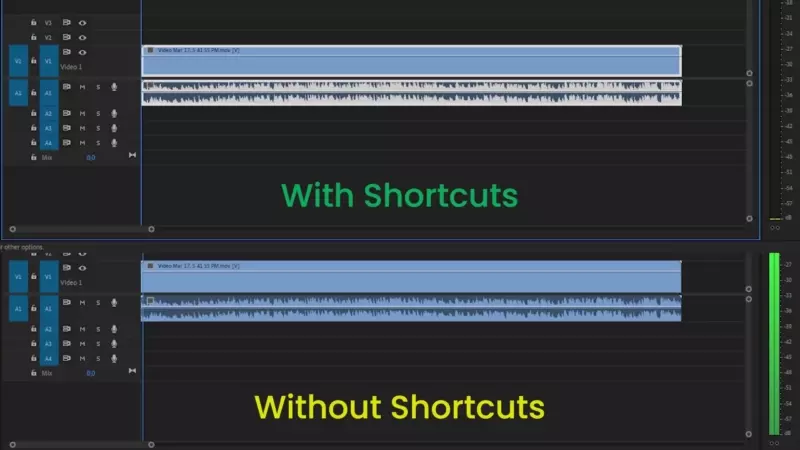
6. Keyboard Shortcuts
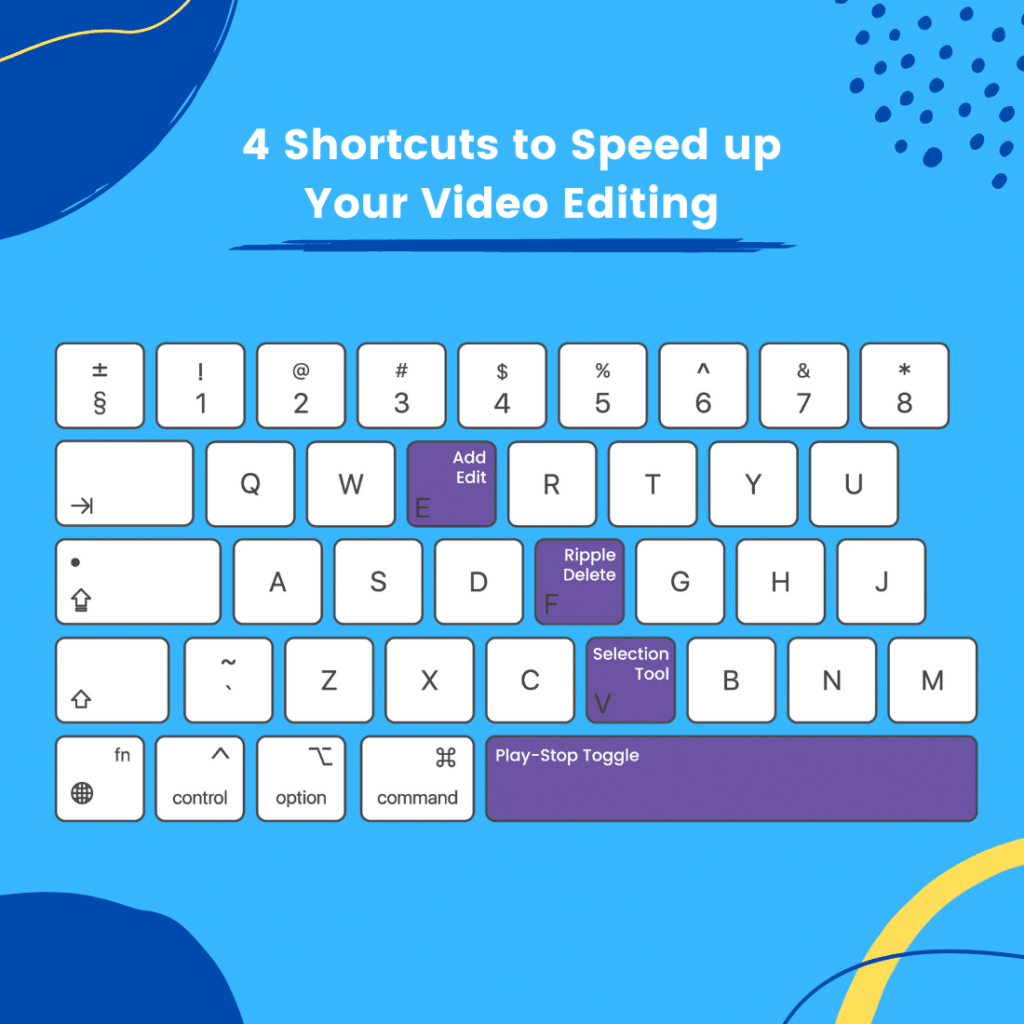
It is crucial to either learn the default keyboard shortcuts for Adobe Premiere Pro or create your own. My editing workflow has gotten twice as fast just by using keyboard shortcuts. Every extra click you have to make to accomplish a task is extra seconds that eventually lead to additional minutes that turn into hours of wasted time.
Keyboard shortcuts will help you shorten the editing when sifting through your footage because you don’t have to spend time selecting the Razor and Selection Tool with your mouse. This leads me to the four essential shortcuts to speed up your video editing:
To create a new keyboard shortcut in Premiere Pro, navigate to “Edit” on Windows or “Premiere Pro” on a Mac and click “Keyboard Shortcuts”. This will open up a window where you can view your existing shortcuts and can create new ones.
7. Using Presets
Presets can be a powerful tool to edit videos faster in Premiere Pro. They allow you to add text animations, transitions, and color grading via drag and drop quickly without adjusting them manually each time. Many creators are selling their presets online, like on Motion Array – one of the most popular places.
Glitch transitionZoom transition
But the real power of presets comes from creating your own presets specifically tailored to your workflow and style. Then, recurring tasks like color grading and text effects can make you much more efficient.
8. Adopt An Assembly Line Method
An assembly line method or a standard process speeds up your video editing workflow. It allows you to concentrate on one task at a given time. If you don’t have a fixed method for editing your videos, it is easy to get distracted by watching the edit several times before moving on to the next task.
The following 6-step process can help you edit faster in Premiere Pro while reducing the turnaround time for your project.
Sift through your footage and only keep the best clips
Add your clips to the timeline, edit and reorder them until you’re satisfied with the flow of the video
Place music on the timeline
Fine-tune the sequence by adjusting transitions and cuts to the beat of the music
Color correction of your video clips
Finalize audio and sound effects
Conclusion
A video editor has a keen eye and can tell a compelling story. But, it’s also about being fast and efficient. Time is money, especially in this business, and your clients will love you for not wasting any of theirs. So, I hope this article helps you speed up your workflow and makes you edit faster in Premiere Pro.
If you want to know more about Video Marketing and how it can increase your social media engagement, please check out this comprehensive guide. This guide will teach you everything you need to know about video marketing, from choosing the right type of video to how you draft your own strategy.